Your learning management system (LMS) is one of the most powerful tools in your digital learning toolbox. Its wide range of capabilities includes saving you time on everyday tasks and being the backbone of your self-paced, mastery learning, or gamified course.
But this incredible scope of possibilities can leave even the most seasoned digital learning veteran wondering where to start.
So, to get your cogs turning, we compiled seven of the most effective ways to organize your courses using an LMS. Each has unique benefits that can help you design the learning experiences that best serve you and your students.
Course Setup #1: The Time Machine
Set up your courses in chronological order.
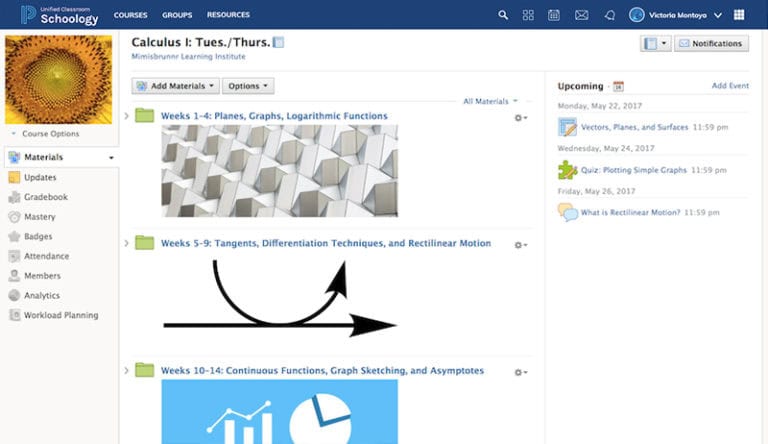
The Time Machine is a very common course setup and is less complicated than it sounds. Just organize your materials using folders labeled in chronological order.
Why choose the Time Machine course setup?
The Time Machine works in tandem with your calendar, making it mentally easier for you and your students to navigate materials, due dates, and more, with limited adjustment over time. Struggling students can quickly jump “back in time” to revisit past lessons, while advanced students can leap into future ones.
Pro Tip: Some LMSs enable you to “hide” folders from or make them available to individuals, groups, or all your students for a more controlled release of content.
Course Setup #2: By the Book
Organize your courses around the chapters of a book or series of novels.
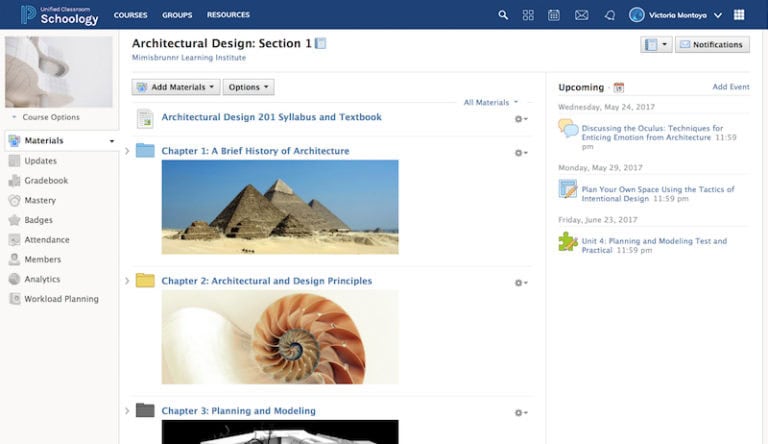
By the Book is exactly how it sounds—a course setup that organizes instructional resources around the chapters of a textbook, a series of novels, or other educational content.
Why choose the By the Book course setup?
Aside from being a really straightforward course setup to navigate, By the Book is a great way to align the student experience with your curriculum and scaffold concepts. This method gives you the opportunity to teach students through the relationships between core concepts or literary works and reinforce how they all fit together at a high level.
Pro Tip: Your LMS may enable you to customize folder colors and add imagery into folder descriptions to simplify course navigation and add aesthetic flair.
Course Setup #3: The Minimalist
Keep your courses simple with a straightforward setup.
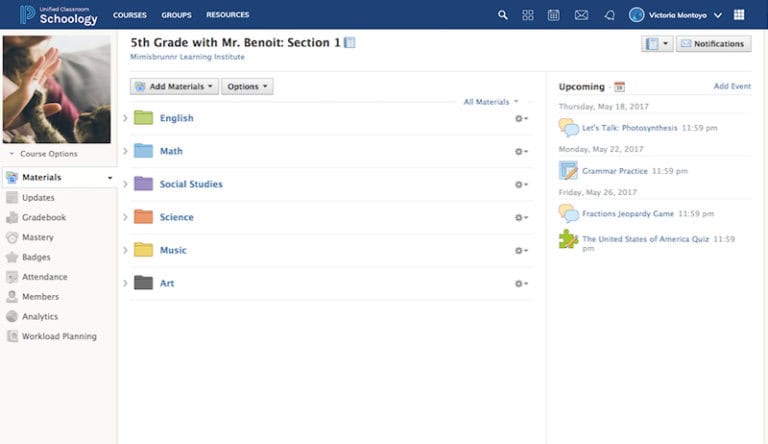
The Minimalist is all about keeping it simple. Just organize your course by material type (assignments, tests, etc.) or by subject, as you might in the elementary course below.
Why choose The Minimalist course setup?
If you are just getting your feet wet in digital learning or you don’t plan to rely on your LMS too heavily, you may appreciate The Minimalist’s straightforward and simple setup. There are, however, a few glaring downsides to this approach. For one, it doesn’t really allow you to organize your course in a pedagogical framework. Also, what you gain in setup speed, you lose in the simplicity of navigation as resources are added over time.
Pro Tip: A great naming system is a must if you plan to organize your course by content type or subject, so figure out an identification strategy and stick to it.
Course Setup #4: The Archiver
Organize your courses with a clean, targeted strategy.
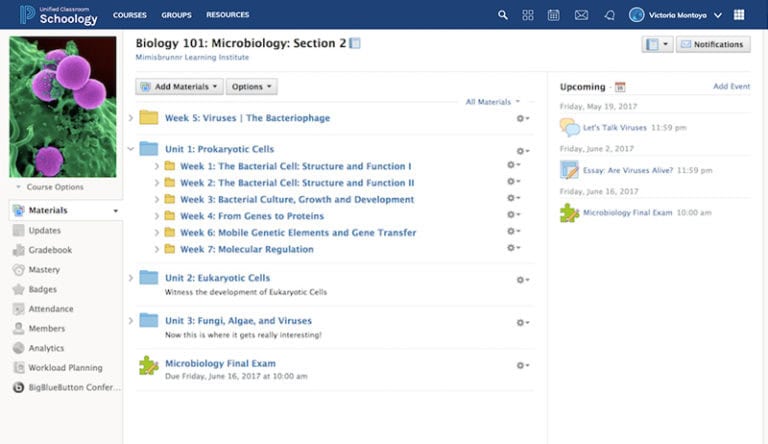
The Archiver helps you control the flow of content by keeping everything in a few top-level topic- or unit-based folders with subfolders nested within them. You then pull one lesson (a subfolder) to the top level at the most relevant time and then “archive” it after you’re done.
Why choose The Archiver course setup?
The Archiver is an excellent way to keep your courses meticulously clean and organized while making it extremely easy for students to know exactly what they’re learning at a glance every time they log in. And if your naming system is solid, then students can always go back into the “archives” to revisit older lessons or explore new ones.
Pro Tip: Your LMS may allow you to “drag and drop” content and folders to the top organization level or nest them within another folder for easy reorganization.
Course Setup #5: The Warm-Up
Start each day with an icebreaker.
The Warm-Up is an effective way to get students ready to learn. Simply begin your classes by asking them a fun or topical question via your LMS’s updates or discussion features.
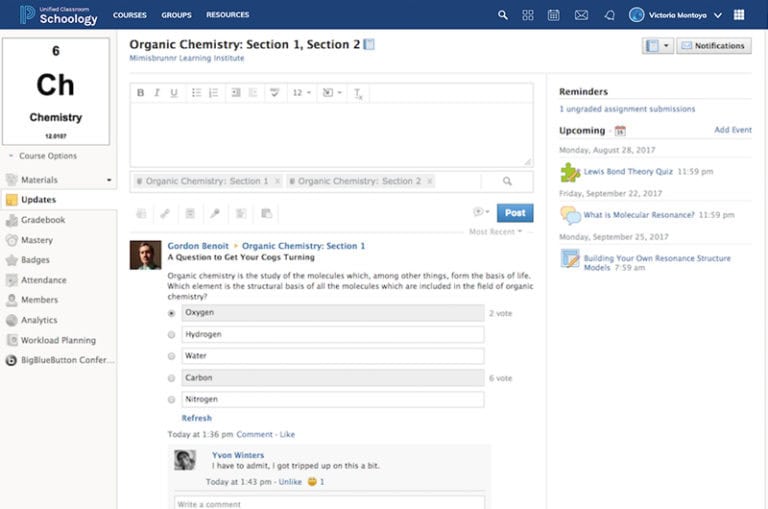
Why choose The Warm-Up course setup?
If you want to get your students’ minds primed and ready before diving into the day’s lesson, then The Warm-Up is your best friend. It’s a great way to establish the beginning of class, help students focus, and get a quick read on what they know about your lesson before you even start it.
For this method to work, it’s important to set expectations that every class will begin with a warm-up. Then you just have to follow through.
Pro Tip: Your LMS may allow you to set your course landing page to an updates feed or message board, so it’s the first thing students see when they log in.
Course Setup #6: Group ‘Em Up
Organize your students into small groups.
The Group ‘Em Up method allows you to differentiate instruction by organizing your students into small groups (a.k.a. Grading Groups in PowerSchool Schoology Learning) and curating content accordingly.
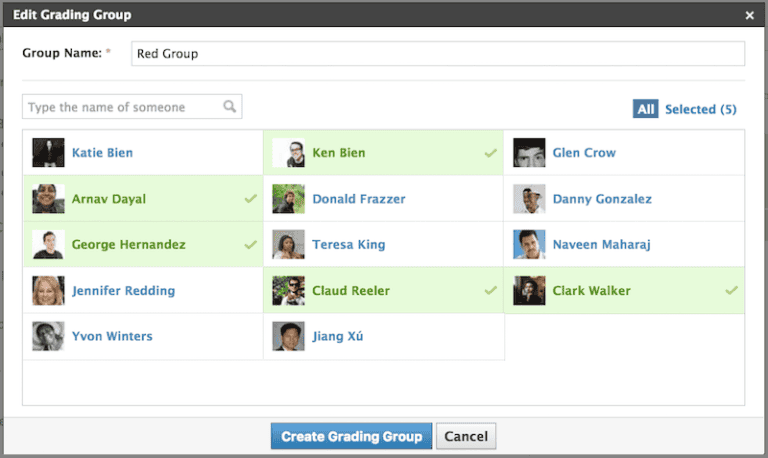
Why choose the Group ‘Em Up course setup?
Organizing your students into small groups within your digital course allows you to tailor instruction to their learning speed, level of need, etc. While this may sound like a lot of work, the LMS has made differentiating instruction easier than ever before. Depending on the functionality of your LMS, you may be able to group your students and assign them projects, discussions, tests, and more based on their grouping without other groups knowing who’s doing what—and track it all easily.
Pro Tip: Your LMS may allow you to organize your students in more than one group, so you can easily tailor instruction based on their Lexile scores and create a different grouping for one-off projects.
Course Setup #7: Pace Yourself
Set up a self-paced course.
The Pace Yourself setup is the ultimate way to provide students with independence and coach them while they learn. By adding step-by-step requirements for how your students interact with your content, you can pace students individually and track their progress.
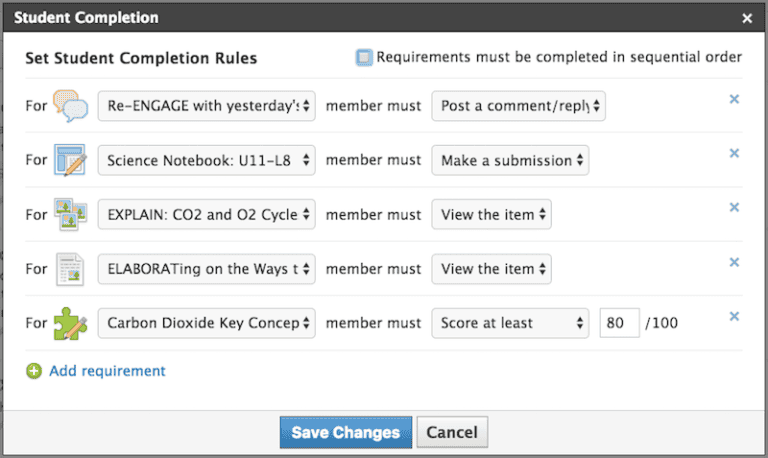
Why choose the Pace Yourself course setup?
Students learn at different paces and sometimes at different times of the day. The Pace Yourself course setup helps you account for those differences while still making it easy to keep track of everyone’s progress. Your LMS may allow you to place requirements on content, such as view item, post a comment, make a submission, or score at least “x”. This gives your students the freedom to learn at their own pace and gives you more time to help those who need it most.
Pro Tip: If your LMS allows for self-pacing, it probably has a way for you and your students to check their progress. This provides greater transparency and helps to inform instruction.
Final Thoughts: Bring It All Together
As you can see, there are many ways to set up your courses, and this is just the tip of the iceberg. In fact, the few setups described above can be combined to compound their benefits.
For example, The Warm Up and The Archiver combine to create a clean and controlled course with a daily prompt. The By the Book, Group ‘Em Up, and Pace Yourself setups together create a concept-driven, differentiated, and self-paced learning experience.
When you understand your goals and have a great LMS to help you reach them, there is no course too complex to build.
Student Success Resource Kit
We’ve compiled resources to help your school or district address unfinished learning, deliver personalized instruction, and better prepare students for future success.